Skinning Silverlight controls just got easier
This has been one of the features that I’ve been excited about for a while since I heard we were changing it. With the release of Silverlight 2 Beta 2 and the updated preview of Expression Blend 2.5 (June 2008), skinning and styling controls within Silverlight gets a bunch easier.

When Silverlight 2 Beta 1 was released there was the possibility of styling/skinning controls. It wasn’t impossible, but perhaps a bit obfuscated to the eye for people with short attention spans like myself. You can read more about those methods here and here. WPF designers were probably laughing that Silverlight developers might have been struggling with skinning controls. Why? Because Blend for WPF supports a right-click “Edit Template” functionality for WPF…so where is it for Silverlight? In the latest release of Blend 2.5 of course!
That’s right—simpler skinning. At RIApalooza in fact I was asked about how one would know *what* elements could be skinned, etc. Outside of the docs, and some spelunking, it wasn’t entirely intuitive. But now, well, let’s take a look. Let’s take a look at Blend 2.5 June 2008 preview and adding a ScrollBar to our design surface:
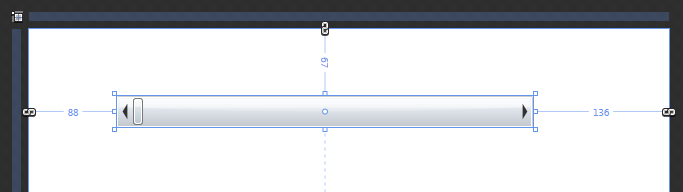
You may not realize it but the ScrollBar has a lot of elements that you can skin. The thumb, the handles, the bar, every little detail…so now in Blend 2.5 we can right-click and choose to edit that:

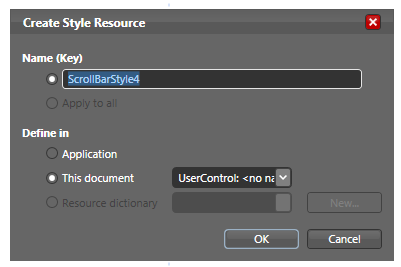
When you do this you are prompted for some settings, one to name the style and the second of where to put it, either in the document resources or as an application resource that other controls may subscribe to:
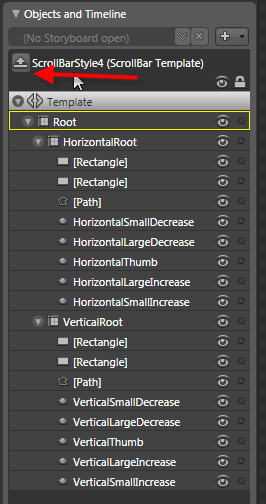
After you do this, your objects and timelines explorer (on the left by default unless you’ve moved it) now changes to represent the layered elements of the control you are skinning now. Note that the “up” arrow will get you out of this mode and back to your documents visual tree of elements. Here’s what the base template for ScrollBar looks like:
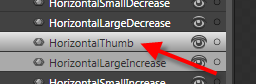
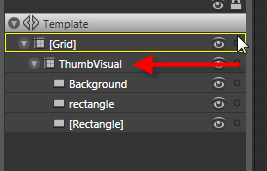
You can continue to dig further. For example with ScrollBar, if you wanted to modify the Thumb, simply select that in the visual object tree:
then right-click on the Thumb now on the design surface and choose to edit that template and now you’ll see that you can edit the Thumb’s template rather simply:
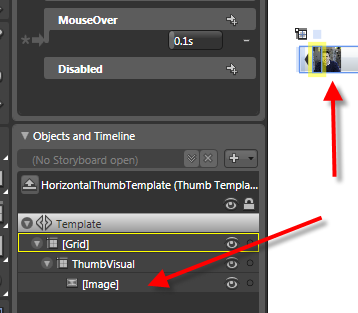
If I wanted to I can remove the three elements that make up the HortizontalThumb and make my Thumb an Image of myself (horrible design, but proving a point):
I chose ScrollBar in this post, but you can do this with any of the controls and the process is the same. This now makes skinning a bit more within a closer reach to most. The reach for developers might be a bit further if you have no design skills…but I’ll gladly send you my picture if you want to use it as your navigational Thumb for ScrollBar.
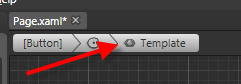
One other tip is that when you have an element on the design surface that has a template skin attached to it, Blend will help you get there even faster rather than having to right-click further. At the top there is a breadcrumb like trail and if you are on an element that has a template there will be a “Template” link you can click directly on:
Hope this helps!
Please enjoy some of these other recent posts...